
The yearlong celebration of Dungeons & Dragons and its 50 years of celebration has brought us a lot of new material to mess around—for better or for worst depending on who you ask. The latest addition is DnDBeyond’s Hold Back the Dead, an adventure for four to six level 4 players that can be neatly put into most campaigns.
Check it out for yourself here: Hold Back The Dead
Now “adventure” is a strong word as when I hear it, I think of Curse of Strahd, Tomb of Annihilation, Lost Mine of Phandelver, etc. Something that you can really sink your teeth into. This is not the case for Hold Back the Dead, which has a run time of about three to four hours. Which is perfect for a session filler.
They’re also appealing to many players nostalgia by providing seven pre-made characters to choose from, all hailing from the Dungeons & Dragons animated series (plus niko, who was introduced in Uni and the Hunt for the Lost Horn, another adventure that uses this cast of characters).

Personally, while very very cool that Dungeons & Dragons is bringing back some memorable characters in a new way, it always leaves a semi-sour taste in my mouth when they get wrung out for every piece of content they can seep out of them.
I digress.
Hold Back the Dead Review
For such a small amount to go off of, the Hold Back the Dead does an excellent job fitting in a ton of different lore, background, creatures, and other tidbits that allow Dungeon Master’s to put on a great game for their players.
It hits this sweet spot of building the foundations of an adventure so that Dungon Master’s don’t have to start from scratch, but enough wiggle room that they can still improve or tweak it to make it fit their own homebrew more.
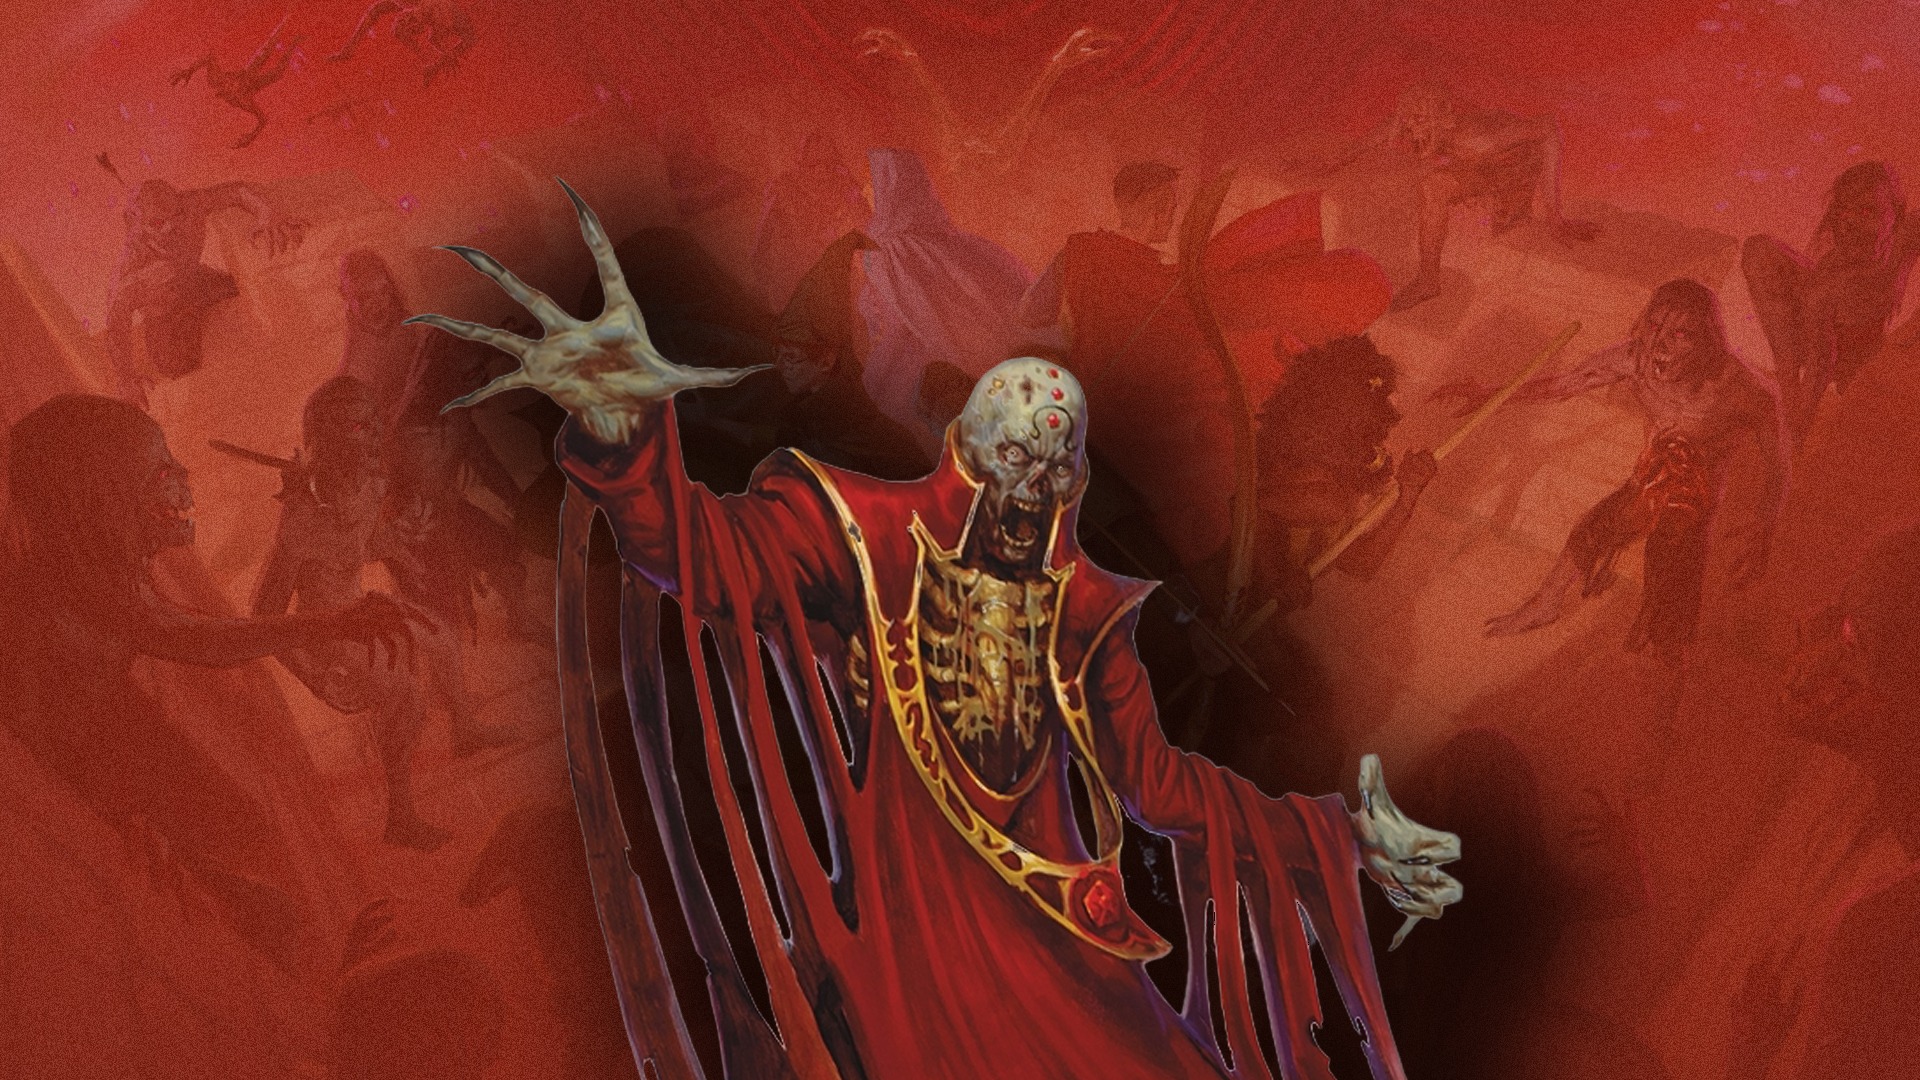
On paper, it’s a simple setup: the players are hired by the Lord’s Alliance to do some routine guard duty while the keep is being restored. But in true D&D fashion, things immediately go sideways when Szass Tam, a power-hungry lich, decides he’d rather use the keep as his own personal war camp.
Now, instead of an easy paycheck, the players are stuck fighting off waves of undead, monsters, and a spectral warlord who really wants them dead. I thought this was a really funny twist and while simple, does a great job in getting the adventure going in a quick manner.
The adventure is structured around escalating combat encounters, with players manning siege weapons, defending the walls, and dealing with saboteurs before taking on the big boss.
There’s some flexibility in how players approach the defense, but make no mistake—this is a battle-focused session. If your table is looking for deep roleplay or complex intrigue, this probably isn’t it. That said, if you want a straightforward, action-packed fortress defense with high stakes and room for creative tactics, Ironspine Keep delivers and Hold Back the Dead will be your little slice of heaven.
Corlie Halvachar, a halfling commander, gives them the rundown. The Lord’s Alliance thought they were just fortifying an old keep to keep an eye on the frontier—then Szass Tam popped in via ominous sky hologram, warning everyone to run or die. The workers aren’t budging, though, and now the players are expected to stand their ground, too.
Mechanically, this boils down to the players choosing a city sponsor, which determines where they’ll defend and what siege weapon they’ll get. Each city brings its own flavor: Baldur’s Gate gets a Clockwork Trebuchet, Mithral Hall has a Forge Launcher hurling molten metal, Neverwinter sets up an Automatic Ballista, Silverymoon brings an Enchanted Ballista, and Waterdeep flexes its wealth with a Storm Cannon.
It’s a fun way to add variety while reinforcing each city’s personality.
Corlie doesn’t sugarcoat the situation. They’re up against a horde of undead, maybe hundreds, and the details on their leader are vague at best. The rest of the keep is barely holding together with a mix of soldiers and desperate workers. There’s no backup coming, no retreat plan, and no extra gold—just the 1,000 GP hazard pay (plus Corlie’s own if the players push her on it).
The fortress features crumbling stone battlements, a fog-covered battlefield, and strategically placed siege weapons to defend against the undead horde. Magical fog obscures the surrounding area until the warlord is defeated, and sunlight is dimmed by an eerie haze.
The Waves
Alright, let’s dive into one of the most epic battles your players will ever face—defending Ironspine Keep from a massive undead siege!
SPOILERS AHEAD—SPOILERS AHEAD—SPOILERS AHEAD
First Wave: Fog, Skeletons, and Zombies, Oh My!
You kick things off with a sense of impending doom as scouts shout that the horde is on its way. And then—boom—dark, sickly fog rolls in, completely obscuring anything further than a few dozen yards from the walls.
Now, here’s the kicker: skeletal soldiers and shambling Ogre Zombies emerge from the mist in every direction, ready to tear into the fortress. These zombies, carrying 20-foot-tall metal ladders strapped to their backs, make the scene even creepier. The skeletons take the high ground first, attacking from a distance until they get close enough to scale the walls.
The Zombies stay on the ground for now, waiting patiently, like they know something the players don’t. But once the skeletons are up or defeated, those zombies are going to start climbing—and not just the walls. It’s a full-on assault, and the characters will have to bring their A-game to hold the line.
Second Wave: The Mangonel Strikes Back
Just when you think you’ve got the upper hand, the fog rolls in thicker, and a mangonel (yep, you read that right) enters the fray.
The skeletons wheel this bad boy into position, and before you know it, they’re launching sacks of squirming severed hands onto the walkway. These sacks open up to release Swarms of Crawling Claws, which is as disturbing as it sounds.
Now, the mangonel isn’t just a set-it-and-forget-it kind of siege weapon. It requires a little time to load, aim, and fire—giving the players a crucial opportunity to sabotage it before it can rain hell down on them. It’s a race against time as the skeletons rush the walls once the mangonel’s ammo runs out. There’s no time to sit back and relax; they’ve got a new fight on their hands.
Betrayal: Corlie’s True Colors
Just when the dust settles after wave two, and the players think they can take a breather, Corlie shows up with a smile that’s a little too wide for comfort. Surprise! “Corlie” is actually a Doppelganger, and the squires? Well, they’re loyal to the Red Wizards.
The players can take an Insight check to figure this out (which, hopefully, they do), but if not, they’ll soon realize when these guys try to sabotage the siege weapon. The false Corlie and her underlings aren’t there to help—they’re there to wreck the defense.
Once the players stop the sabotage attempt, the fight escalates, and it’s clear that this conspiracy is bigger than just the undead attack. A full-on battle erupts, and now the characters have to deal with traitors in their midst while also holding their ground (why battle tactics are important).
The Final Showdown
Just when everyone’s wiped out and out of potions, the real threat makes its move: the Warlord. Emerging from the fog like some dark, mist-infused creature, the Warlord is a Wraith that doesn’t take kindly to being thwarted. Four Zombies trail behind it, shambling toward the walls, but it’s the Wraith that steals the spotlight.
This boss fight is no joke. The Wraith floats above the fray, out of reach of most melee attacks, and when it falls? Well, it doesn’t stay dead. It breaks into three Shadows—each one a ghostly version of the Warlord—looking for revenge. And you can bet your players are going to be feeling the pressure at this point, especially with all the mist and shadows swirling around.
Once the Wraith and its Shadows are dealt with, the fog clears, and the remaining undead minions either flee or get mopped up by the other fortress defenders. And just like that, the siege is over.
The Aftermath: Victory, Rewards, and Future Trouble
With the horde broken and the fortress safe (for now), Corlie returns, bruised but relieved, and declares the characters Ironspine Keep’s greatest defenders. And of course, they get their well-earned reward: 1,000 GP each from the Lord’s Alliance. Not bad for a day’s work, right?
But wait—there’s more. The real Corlie isn’t staying. She’s got bigger plans, and she needs to leave Ironspine Keep in capable hands. This is where your players come in. They’ve earned a solid base of operations for their future adventures, and Ironspine Keep is theirs to defend. And if Szass Tam has anything to say about it, this won’t be the last time they have to fend off an undead assault.
Final Thoughts
I was honestly a little wary of this adventure when I first found it on DnDBeyond. Except that it really came around and is something that I am going to try and sneak into my next game.
What do you all think? Is this something that you all want to try in your next session?
If you liked this article, we would really appreciate it if you signed up for our newsletter to receive the latest and greatest on what we have to offer here at Knight’s Digest or Donate to help us keep the site running! We send out monthly emails on what you’ve missed along with NPCs, Locations, and other fun material that you can incorporate into your next game!


Leave a Reply